 Also I have been experimenting with making a form for the fiberglass hood that we will be building. I have been searching the Internet for the best way to make forms and apply the fiberglass. This is another art form that will test my meager artistic abilities. But I am motivated by the desire to make the best looking ride possible for my girls. I figure that if you can learn to make a miniature version of something then you should be able to use that same process to make the full scale version. So I shrunk the hood down to about a one fifth scale to make a trial hood. I will make a chip board template to establish the profile of the hood.
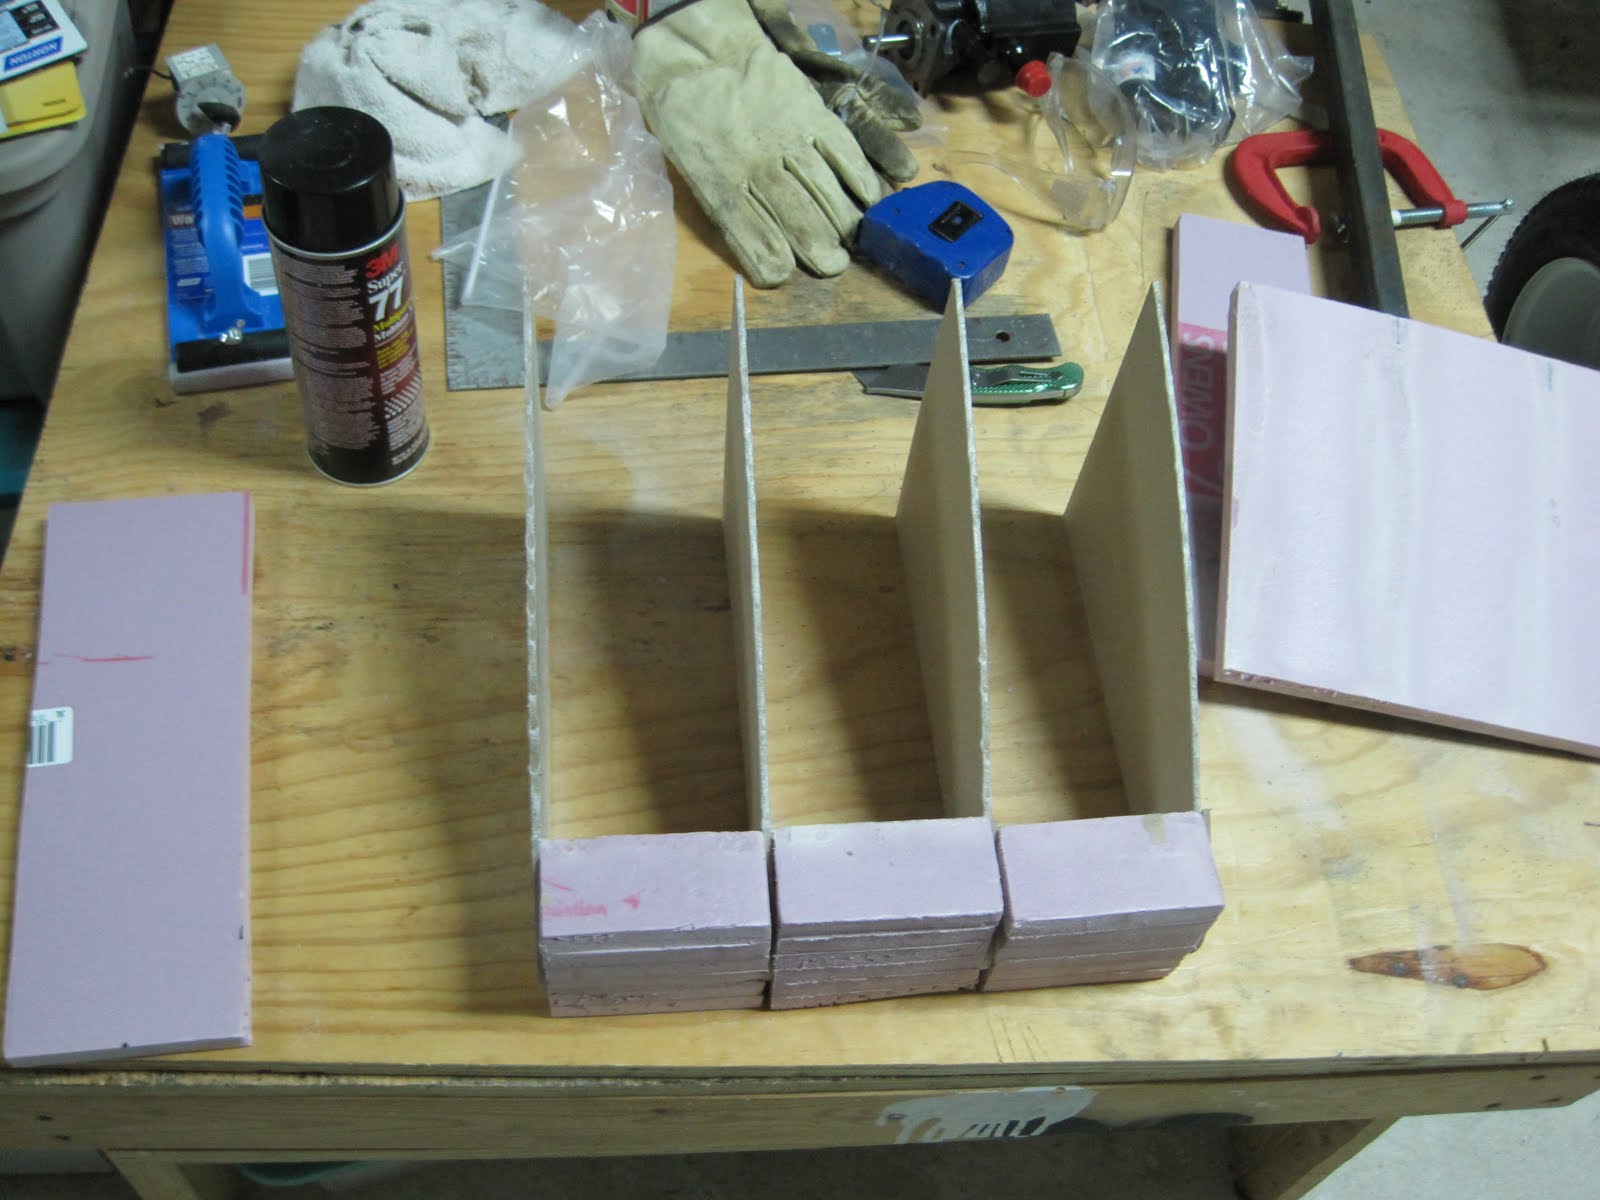
We will use standard foam insulation for the form. This is the same stuff you get at any builders supply. It will be glued together using 3 M Super 77 spray glue.

The area that will require the most care in forming will be the tip of the nose of the hood. You can easily layer up the thickness required by gluing pieces together. I am using 1/2" thick material. You simply cut the blocks large enough so that they cover the entire area you are trying to form. The chip board templates will act as your guide to trim away any excess foam so that you end up with the required shape. The foam can be easily cut and shaved with a sharp utility knife to remove the majority of trim and then sand paper can be used to shape the contour.

After gluing the required pieces together they can then be glued to the templates.
 The idea is to be sure and glue the templates parallel and perpendicular to each other. I clamped a piece of plywood to the table for a back stop top keep the templates spaced correctly.
You will notice that I have not filled in the material all the way to the back. That is because I am going to try to lay a flat piece of foam on the back part and see if it will bend to the contour of the back part of the hood and save a lot of extra gluing. I will let you know how that works.
Now I want to jump back to the seat. Brenda found a piece of black marine vinyl at the fabric store that will work perfectly for the seat cover. But first we need to round the corners of the seat frame. I just cut the corners off with a circular saw to remove the majority of the trim and then you can use the trusty angle grinder with a flap wheel to round it off nicely.

Next we need to glue the sponge cushion to the wood seat frame. If you don't glue it down it may cause some problems trying to shift around later. Weldwood contact cement works well.
You don't need to put it on very thick. I just use a piece of chipboard as a brush.

After the sponge cushion is glued in place then the sponge can be trimmed to match the contour of the seat frame using the angle grinder and flap wheel. Caution!! The flap wheel will remove sponge very quickly!! So use extra care when trimming the sponge or you will need to glue another edge on and do it again. But that will be OK. We learn as much from mistakes as we do from success. Probably more.
 Now we can attach the upholstery to the frame. You will need a heavy duty staple gun with about a 3/8" size staple. My gun is a T-50 style stapler. I have done a little bit of this through the years but Brenda is the pro. So I got her to help and of course she ended up doing most of the work with me assisting. The first thing to do is place the fabric upside down on a flat surface. Next position the seat upside down so that there is enough fabric to cover the entire surface of the frame as well as enough to staple securely to the underside of the frame.
 You can start anywhere but we started at one of the short sides.
 You want to end up with a tight fit so be sure to stretch it a little as you go. If your fabric has a design you will need to work with it in a way to keep it square. Our fabric has no design and that makes it a lot easier. Just be prepared to remove some staples and restaple as you go if necessary. The trickiest part about the whole thing is the corners.
  You will find that there is a need to overlap the fabric some at the corners in order for it to lay flat. Be careful not to cover the connecting holes.
 You can trim off the excess material as you go. Just be sure not to trim off too much.
 The seat is now finished. I had the girls sit on the seat and Paige's feet are about 2 inches off of the floor board. I figure that should be just about right. I plan to put on three sets of seat belts.


No comments:
Post a Comment